tactical tip: embedding a vertical reference line in Excel
Today's post is a step-by-step Excel “how-to” inspired by a reader question we received following a recent post on using dotted lines in data visualizations.
Dave asked:
“Do you know of a trick for drawing vertical lines to delineate years (or actuals/historical vs forecast/future segments of the chart)? I currently have to draw them with the line drawing tool, which gets messy when moving the chart on a PPT slide. If there were a way to embed it in the data or somehow format the chart, that'd be awesome.”
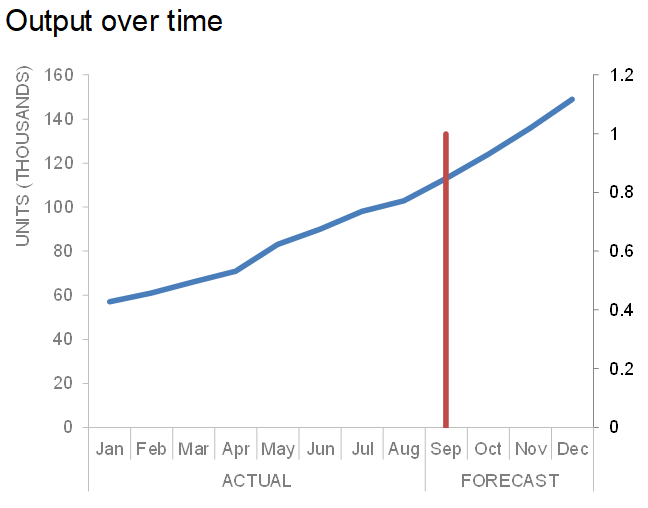
The following chart illustrates what Dave describes. The data is units of output over time where the first nine months of the series are actual data and the remaining four months of the year are a forecast. The dotted line serves as a visual cue to differentiate actual from forecast. Created in Excel, the line was physically drawn on the graph with the Shape Illustrator. While this approach might suffice as a quick method for achieving the desired effect; it isn’t ideal for recurring use of the graph, particularly if the line’s position on the x-axis might change in future iterations.

After some research and playing around in Excel, I’ve devised one method for achieving this effect, which I’ll outline in this post (I’m sure there are others!). Don't be dismayed by the number of steps: it's a one-time setup after which can be easily refreshed in future iterations by changing where you want the reference line. I’m using Excel 2016 and you can download the accompanying file.
In my spreadsheet, the data for the Output over time chart looks like this:

1. Go to a blank cell range and enter these values as shown in my screenshot below. I’m choosing to add these new values directly underneath my data range in cells F19:G21. This will eventually become the coordinates for a secondary scatterplot that we’ll add in a later step.
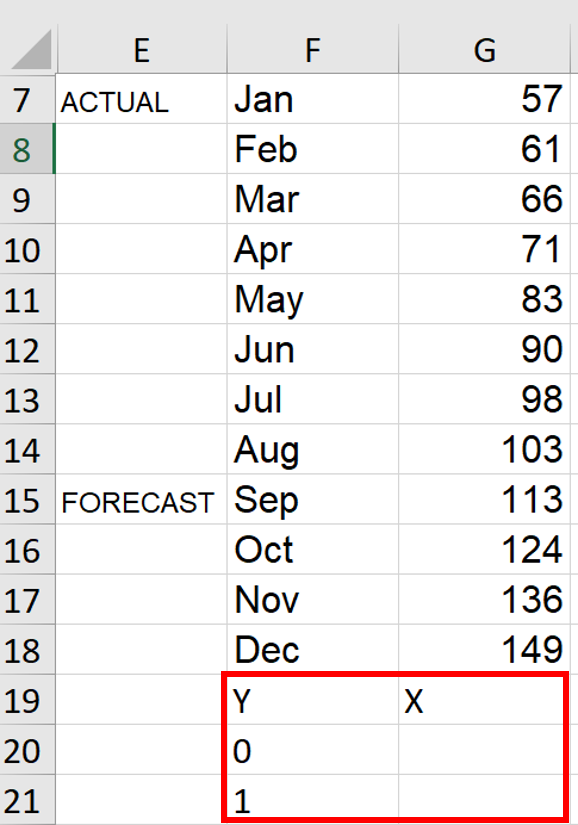
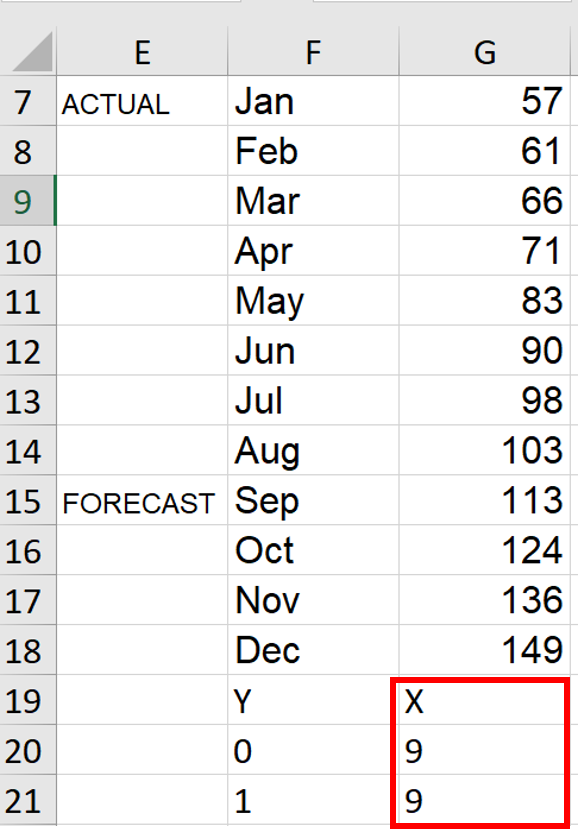
2. Choose where you want the vertical reference line to cross the x-axis and enter those values below “X”. In this example, I want the line located on the September data point, the ninth point in my data series. In cells G20:G21, I entered “9” in each, as shown below. (Note: for a more automated approach in a larger dataset, a MATCH formula could also calculate where September falls in the range: =MATCH("Sep",$F$7:$F$18,0).
3. Add a new data series by right-clicking the graph and choosing Select Data:

4. In Select Data Source dialog, click the Add button.

5. In the Edit Series dialog, enter a name for your data series (I chose “reference”) and select the X values you entered from Step 2. I selected the 9’s in G20:G21. Click OK to exit the dialog boxes.

The resulting visual looks like this:

6. Right click the new line and choose Change Series Chart Type.

7. In the Change Chart Type dialog box, select Combo section under All Charts tab. Then select Scatter with Straight Lines and check the option for Secondary Axis. Click OK to exit.

The resulting visual looks like this:

8. Go to the chart, right click the red reference line and choose Select Data again. In the Select Data Source dialog, highlight reference and click Edit.

9. In Edit Series dialog, update the X values to be the original values you selected in Step 5. Set the Y values to be 0,1. Click OK to exit.

The resulting visual looks like this:
The remaining steps are visual cleanup: first, I forced the red line to align with the top of the primary y-axis and second, I hid the secondary axis line and text labels.
10. Right-click on the secondary y-axis and select Format Axis:

11. In the Axis options section, type 1 into the textbox beside the Maximum option.

12. In the Text Options section, under Text Fill, choose No fill. This will remove the text labels on the secondary y-axis.

13. In the Axis Options section, under Line, choose No line. This will remove the secondary y-axis line.

Voila! The resulting visual has an embedded vertical line, which is plotted on a hidden secondary y-axis.
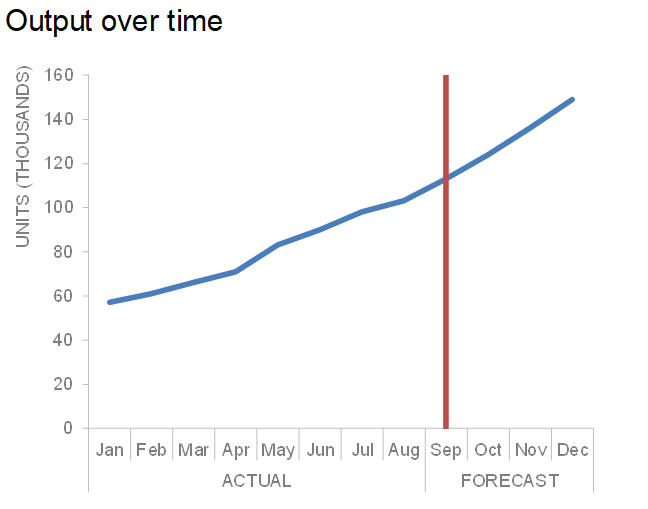
Recall that this goal of this specific scenario was a dotted line which visually differentiated the actual and forecast sections. My last step was to change the formatting of the line to appear as a thin, grey dashed line.
(Note: To achieve your preferred formatting, right-click the line and select Format Data Series in the context menu where you’ll find formatting selections in the resulting dialog pane.)

This method does come with some trade-offs to consider.
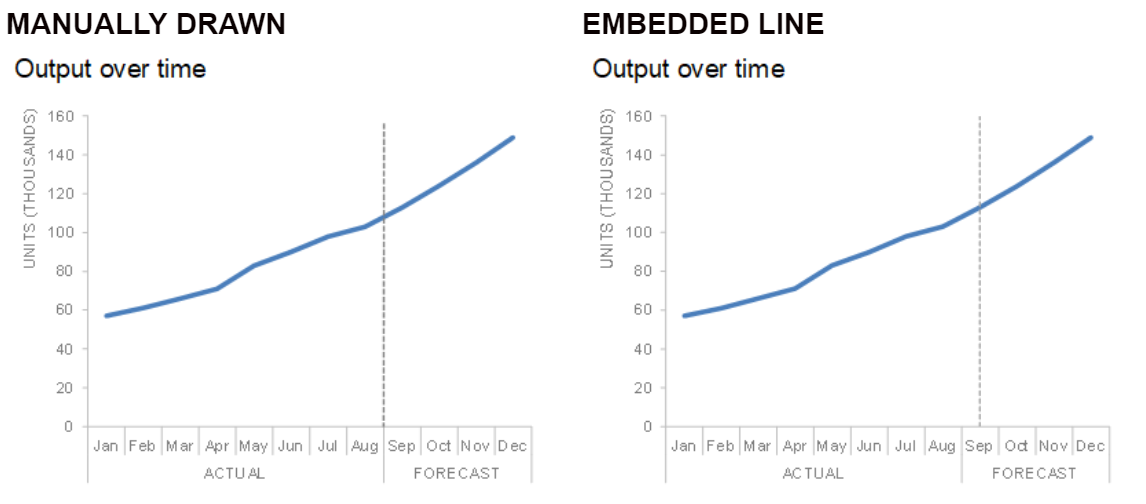
One downside is that you lose some control over the exact placement of the line where it crosses the x-axis. Below you’ll see a comparison between the manual vs embedded approach. With the manual approach, the line can be drawn exactly on the tick mark between the Aug & Sep data points, providing a clean alignment with the x-axis. With the embedded approach, the line is centered above the Sep label, resulting in a slightly less seamless effect.
On the cosmetic side, another downside is losing the flexibility to manipulate the length of the line for labeling purposes. I’ll illustrate this with a horizontal bar chart (which I also created using this method). With the manual approach, I can physically draw the line to extend above the x-axis line, aligning it closely to the “Target” text label. With the embedded approach, the line stays below the x-axis line, creating a gap between the line and the label that describes it.

You can download the Excel file to see the behind-the-scenes of these graphs. Are there other methods you’re aware of for achieving this effect? Or other considerations with embedding the reference line directly? Leave a comment with your thoughts!